
Share this:
Cricut machines have revolutionized the world of crafting, making it easier and more accessible than ever before. These cutting-edge crafting devices offer endless possibilities for creating personalized designs and intricate patterns. To help you make the most of your Cricut machine, we’ve compiled a list of the top 10 Cricut hacks. Whether you’re a seasoned crafter or just getting started, these tips and tricks will enhance your crafting experience and unleash your creativity with these top 10 Cricut hacks.
1 – Master the Mat Adhesion:
To ensure your material stays in place during cutting, achieving proper mat adhesion is crucial. Before loading your material onto the mat, use a lint roller or a fabric grip sheet to remove any debris or loose fibers. Additionally, if you find that your mat has lost some of its stickiness, you can use a light application of an adhesive spray to revive its grip.
Step by step instructions for How to Clean & Re-Stick Your Cricut Cutting Mats.
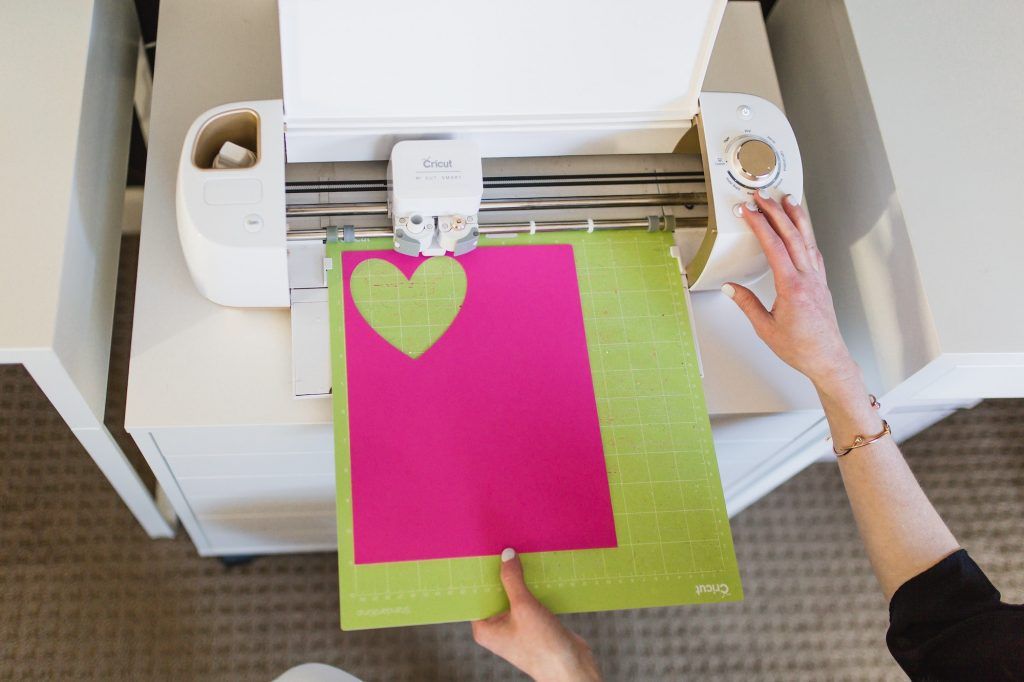
2 – Optimize Material Placement:
When working on a project that requires multiple cuts, plan your design layout strategically. Arrange your designs on the mat to maximize material usage and reduce waste. This way, you can save on materials and ensure the most efficient cutting process.
Learn How To Optimize Material Placement With Your Cricut!
3 – Get the Most Out of Your Blades:
Different materials require different blade settings. Instead of constantly changing blades, consider investing in a set of interchangeable blade housings. This way, you can quickly switch between blades without interrupting your workflow. Additionally, regularly clean and sharpen your blades to maintain their cutting precision and prolong their lifespan.
Ever wondered which blades, housings, and machine tools are compatible with your Cricut machine?
Or, are you still trying to figure out which blade cuts which material? If so, this blog post is for you.
Ultimate Guide to Cricut Blades for Beginners
4 – Use Transfer Tape Effectively:
When working with adhesive vinyl, transfer tape is essential for accurately transferring your design onto your desired surface. To prevent bubbles and wrinkles, apply the transfer tape at a 45-degree angle, starting from one corner and gradually smoothing it out across the design. This technique ensures a smooth application without any mishaps.
Learn how to use transfer tape for vinyl projects with Jennifer Maker.
5 – Utilize Weeding Box:
When working with intricate designs, weeding (removing excess vinyl) can be time-consuming and challenging. To simplify this process, use the “weeding box” technique. Instead of removing each tiny piece individually, create a rectangular box around your design and weed out the large sections first. This method saves time and minimizes the risk of damaging your design.
You can save vinyl and make weeding easier by creating a weeding box in Cricut Design Space! This weeding box trick is also helpful if you’re cutting large numbers of the same image and want to make separating images more simple.
How to Make Weeding Vinyl Easier with a Weeding Box
6 – Explore Print Then Cut:
The Print Then Cut feature allows you to print designs on your home printer and then cut them out precisely using your Cricut machine. This hack is especially useful for creating stickers, labels, and intricate designs that require color and detail. Make sure to calibrate your printer and always use high-quality ink and paper for the best results.
Learn to use the Print Then Cut feature in Cricut Design Space using both uploaded images and images in Design Space. You will need a Cricut machine and a printer to use this function. Print Then Cut will work with a variety of materials such as paper, Cardstock, printable vinyl and sticker paper.
Learn How To Print Then Cut with your Cricut Machine!
7 – Create Stencil Designs:
If you enjoy working with stencils, Cricut machines offer a simple and efficient way to create your own. Use adhesive vinyl or stencil material to cut out your design, and then apply it to your desired surface. This hack opens up a whole new world of possibilities for home décor, fabric painting, and personalized gifts such as coffee cups, tumblers, wooden signs and more.!
In this Cricut tutorial you’re going to learn how to make a stencils in Design Space.
Once you know the simple steps in order, it’s really quite easy.
How To Make A Stencil With Your Cricut The Easy Way!
8 – Utilize “Weld” and “Slice” Features:
The “Weld” feature in Cricut Design Space allows you to merge multiple shapes into a single, seamless design. This is particularly useful when creating custom lettering or complex designs. On the other hand, the “Slice” feature enables you to split images or text into separate pieces, allowing for even more creative flexibility.
Learn How To Use Group, Attach, Weld, and Flatten in Cricut Design Space
9 – Customize Pre-Made SVG Designs:
Design Space offers a vast library of pre-made SVG designs similar to what you can find on SVGed, but to make them truly unique, consider personalizing them. Modify fonts, alter shapes, or add additional elements to make the design your own. This way, you can start with a foundation and transform it into something that reflects your personal style, vision and crafting goals.
SVGed has Free SVG Designs and Free Design Fonts to help you get started modifying designs for your next craft project and crafting goals.
10 – Learn from the Cricut Community:
Finally, don’t underestimate the power of the Cricut community. Join online forums, Facebook groups, and attend local crafting events to connect with fellow enthusiasts. These communities are an excellent resource for inspiration, troubleshooting, and sharing tips and tricks. Learning from others’ experiences can help you uncover new possibilities and take your crafting skills to the next level.
Top 3 Cricut Communities to Get You Started Sharing With Fellow Crafters.
The world of crafting with Cricut machines is full of endless possibilities, and these top 10 Cricut hacks will help you maximize your creativity and efficiency. From mastering mat adhesion to utilizing the “Weld” and “Slice” features, these Cricut hacks are designed to enhance your crafting experience and make your projects stand out. By incorporating these hacks into your workflow, you’ll be able to unlock the full potential of your Cricut machine and bring your crafting visions to life. Happy crafting!